Ecommerce
1 Object type • 4 demo Objects
Follow the steps below to install this Block. Make sure you have reviewed the getting started steps.
This will add the products Object type to your Bucket.
This will add the ProductCard.tsx,ProductList.tsx, SingleProduct.tsx, and cart files to cosmic/blocks/ecommerce. This will also add the image-gallery block to be used in the single product page.
This ecommerce block uses Stripe to process ecommerce payments. Add the following Stripe API key to the `.env.local` file. Change the value to your Stripe secret key. Find your Stripe API keys in the Stripe dashboard.
Update your app/components/Header.tsx to include the CheckOut component. (Note: this assumes you've already added the Layout Block).:
Log in to the Cosmic dashboard and install the Stripe Products extension located in Project / Extensions. Follow the steps to add your `stripe_secret_key` to begin adding products to Stripe from the convenience of the Cosmic dashboard.
We can use webhooks to keep your products in Cosmic in sync with Stripe automatically. First, upgrade your project to the webhooks add-on located in Project / Billing / Add-ons. Then create a new file at `app/api/cosmic-webhooks/route.ts` with the following:
After deploying your project, you can take this endpoint `https://your-project-domain.xyz/api/cosmic-webhooks` and add it to the Cosmic Webhooks section located in Project / Settings / Webhooks. The configuration should look like this:
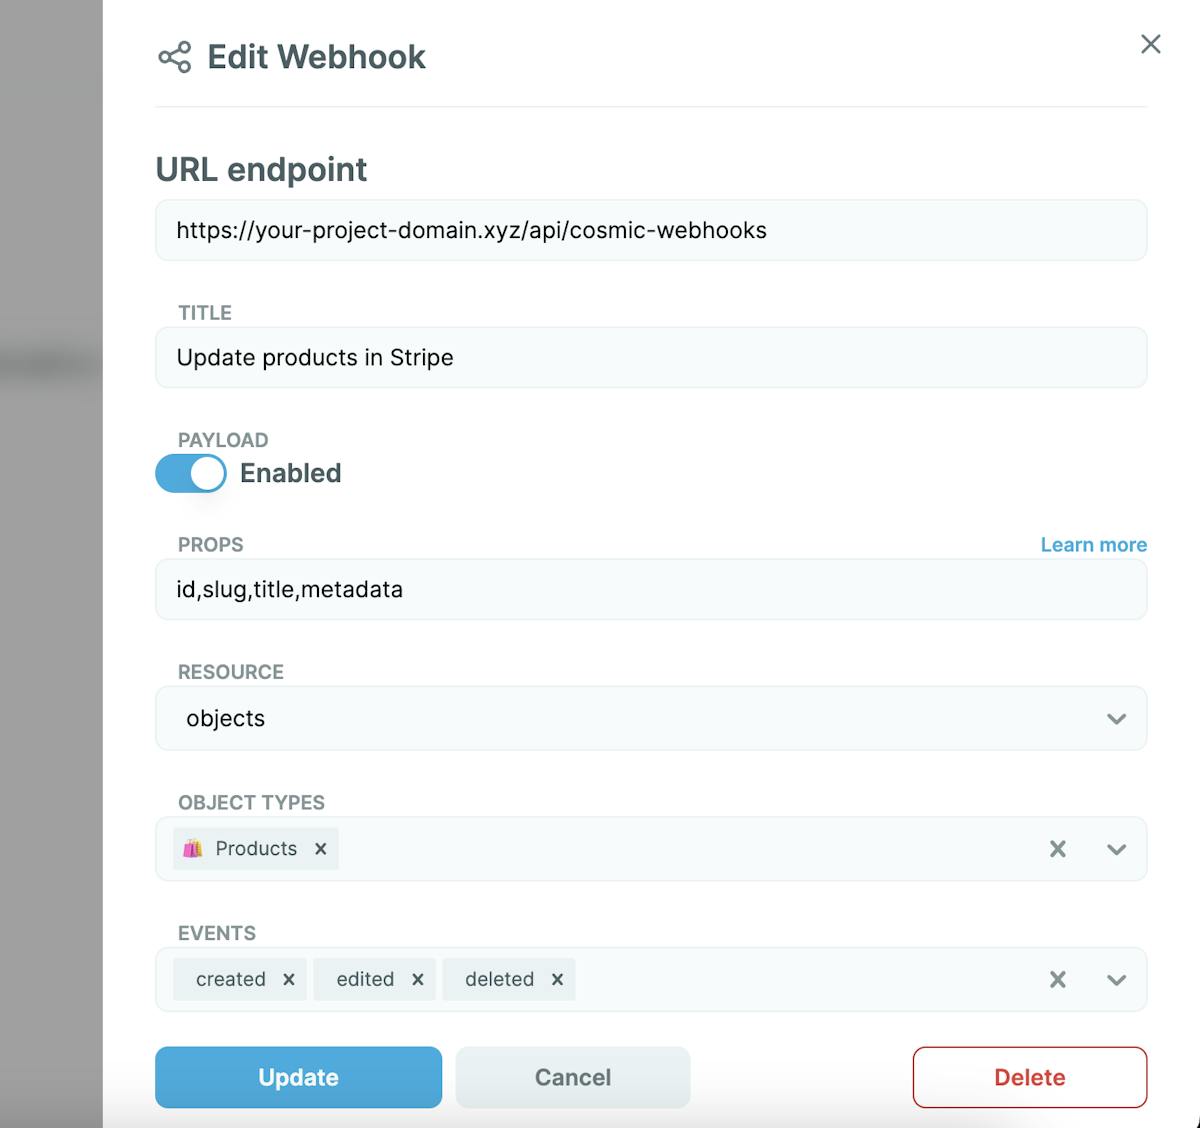
After adding your webhook, you should now see that whenever products are added, updated, or deleted in Cosmic they will be updated in Stripe.
More Examples
Enable draft preview by setting the status property on the Block. View the draft preview content by setting the ?status=any in the URL. Note: This is a basic example. It is advisable to consider a security strategy if you intend to keep your preview private.
To add the draft preview link in the dashboard, go to Products Object type > Settings and add your preview link in the dashboard under Additional Settings. For example adding the link http://localhost:3000/shop/[object_slug]?status=any will add a Preview button to each product.
Use the load more pagination Block to fetch additional products using a Server Action.
First, enable localization in the dashboard by going to Products Object type > Settings under Additional Settings. Then set the locale on your specific Object. Finally, pass the locale parameter into the query to fetch your localized content. Then go to any page with localization set, for example: https://localhost:3000/es/shop or https://localhost:3000/en/shop.
More to explore
Landing Page
1 Object type • 1 demo Object
Layout
2 Object types • 3 demo Objects
Blog
3 Object types • 2 demo Objects
Comments
1 Object type • 5 demo Objects
Contact Form
1 Object type
Events
1 Object type • 3 demo Objects
Ecommerce
1 Object type • 4 demo Objects
Videos
3 Object types • 9 demo Objects
Team
1 Object type • 4 demo Objects
Testimonials
1 Object type • 4 demo Objects
FAQs
1 Metafield
Image Gallery
1 Metafield
Navigation Menu
1 Object type • 2 demo Objects
SEO Fields
1 Metafield
Pagination
No content installed
Localization
No content installed
File Upload
No content installed
User Management
1 Object type